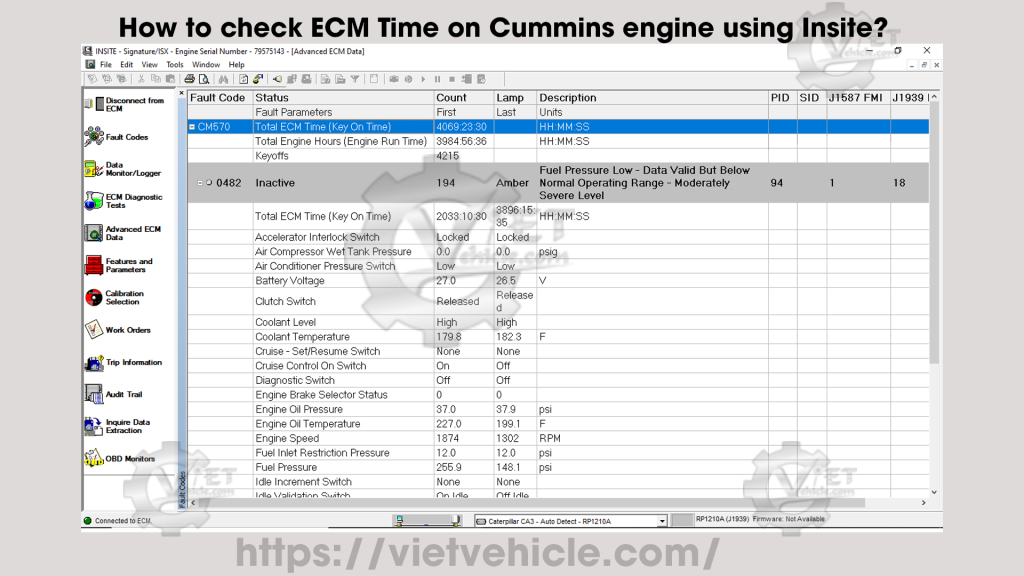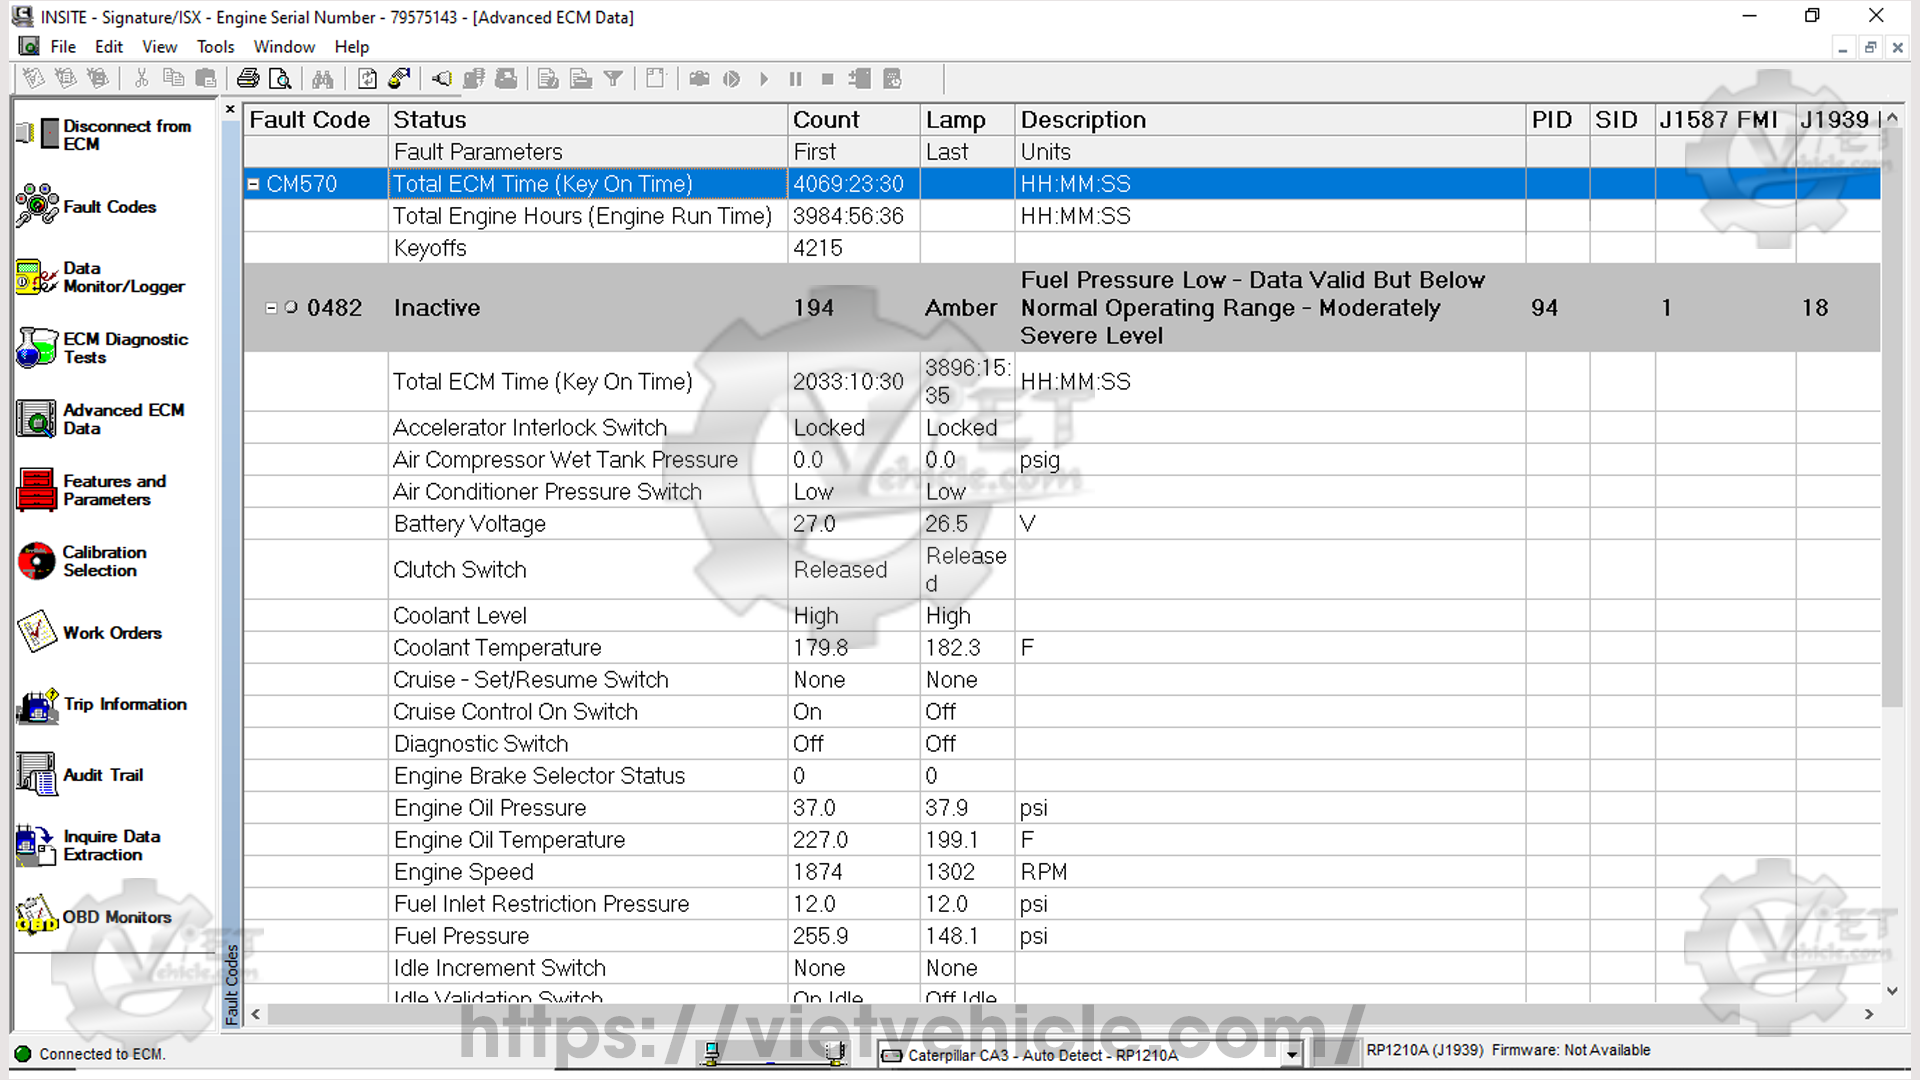
Figure 1.1 – Total ECM Time (Key On Time)
During engine operation, the ECM records and stores information related to various events, including time stamping. Two different measures of time are available:
ECM Time (Key On Time)
Total ECM run time as recorded by the ECM represents the cumulative operating time of the ECM to date (HH-MM-SS). Refer to Figure 1.1. Additionally, Engine Hours (Engine Run Time) accounts for the total engine run time for all ECMs on this engine. Prior ECM times must be manually entered by the user (HH-MM-SS).
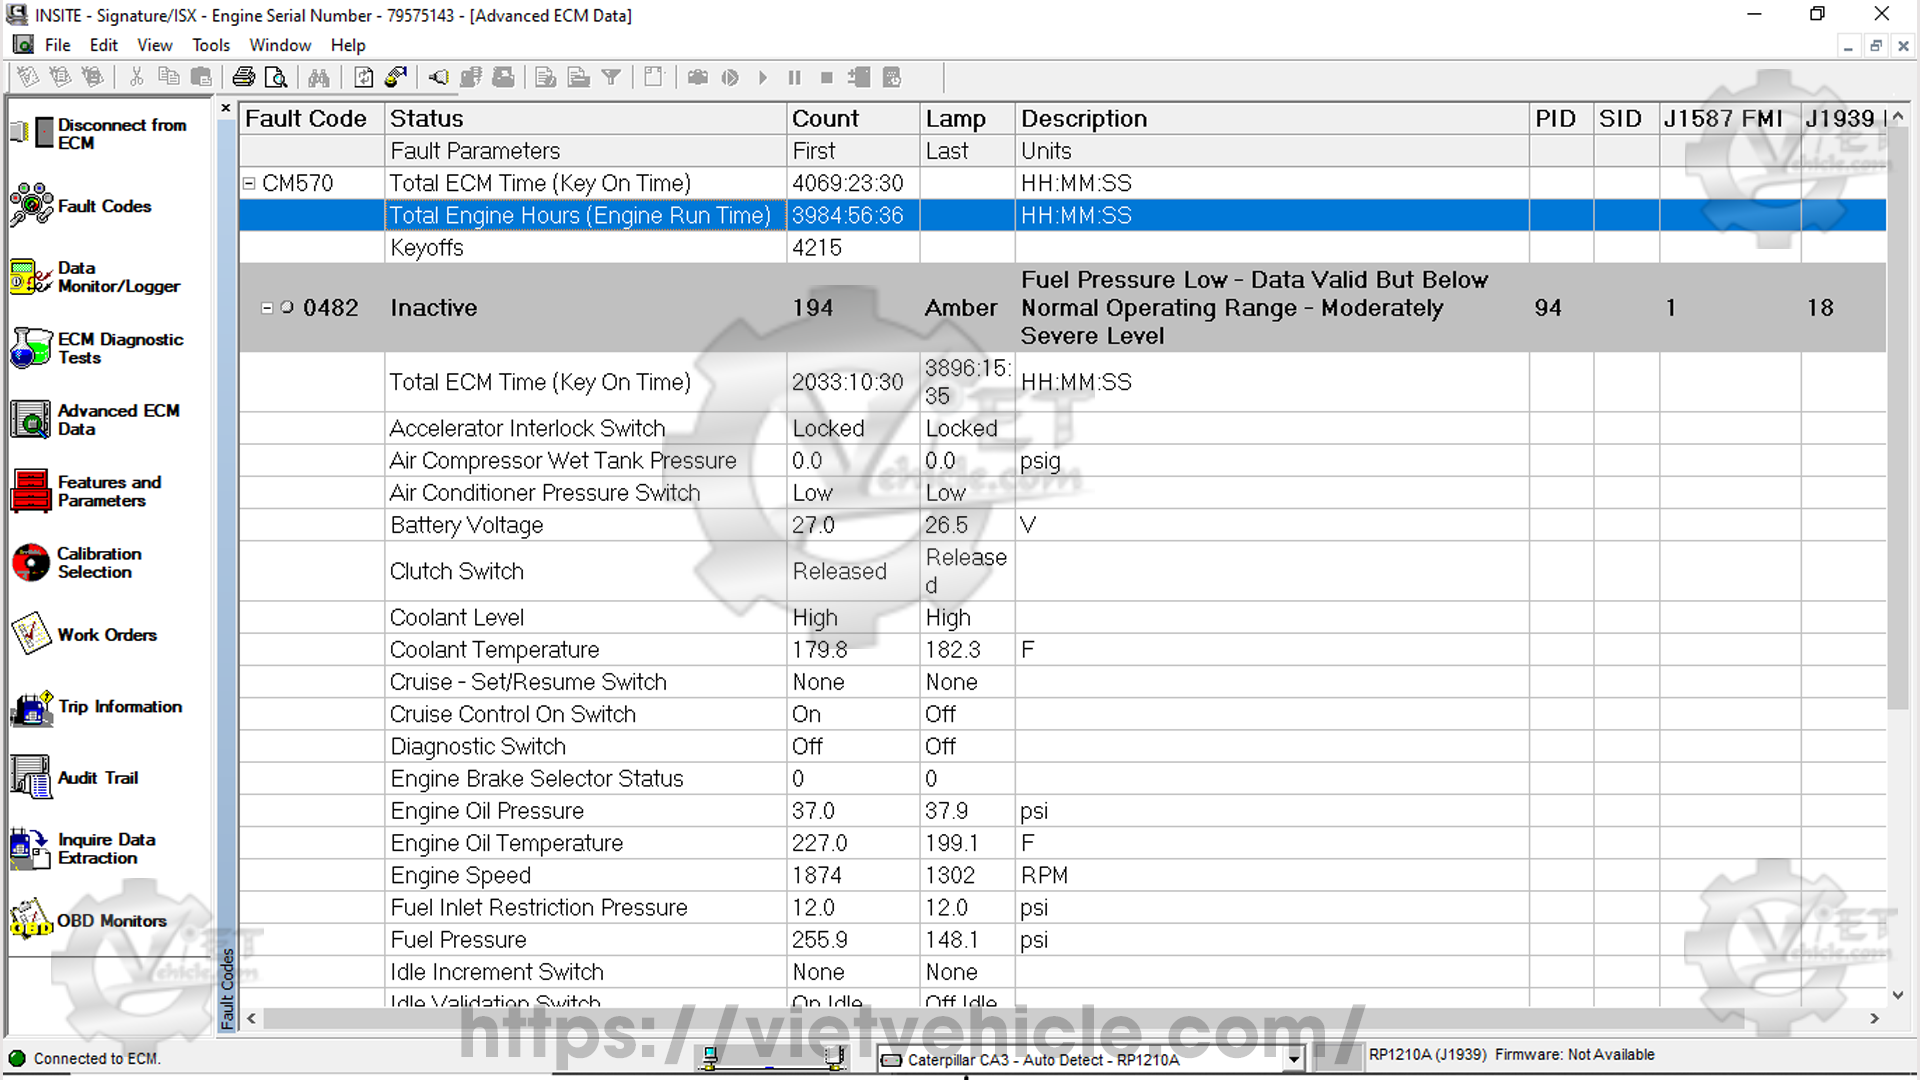
Figure 1.2 – Total Engine Hours (Engine Run Time)
ECM Real Time
ECM Real Time provides a date and a 24-hour-based time stamp. This feature allows for automatic synchronization of ECM Real Time to match the PC date and time or manual adjustments to enter the current ECM Real Time. Ensuring that the local time zone is correctly set is crucial to maintaining accurate local time.
A battery backup maintains constant power to the Real Time Clock. If the battery backup is not present, any power loss to the Real Time Clock (e.g., disconnecting the batteries for more than five seconds) results in a loss of clock accuracy. This situation generates fault code 319, causing the maintenance lamp to illuminate.
Enabling the Real Time Clock
To enable the Real Time Clock:
a) Accessing the Real Time Clock
- From Advanced ECM Data, select Real Time Clock. (For more details, refer to “Advanced ECM Data on Cummins INSITE Software (Cummins Engines).” )
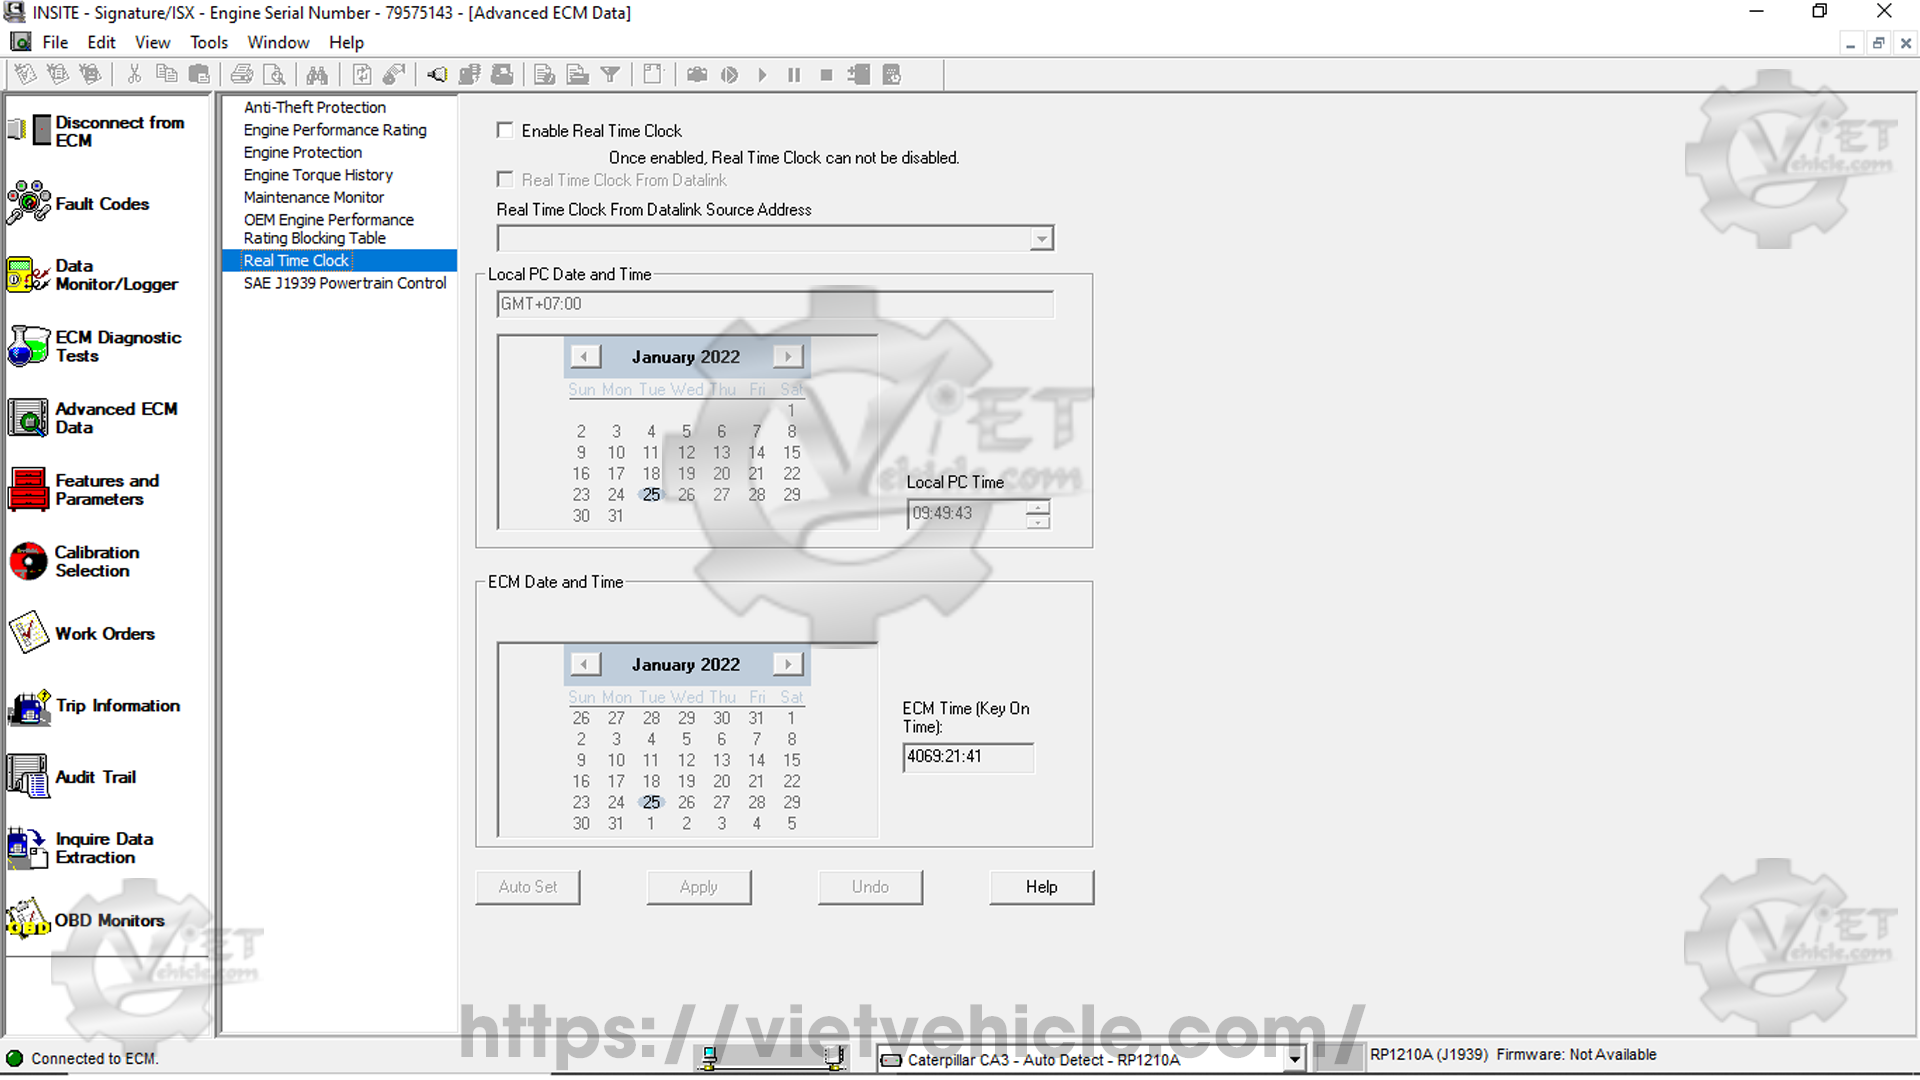
Figure 1.3 – Real Time Clock
b) Enabling the Real Time Clock
- Select the Enable Real Time Clock checkbox.
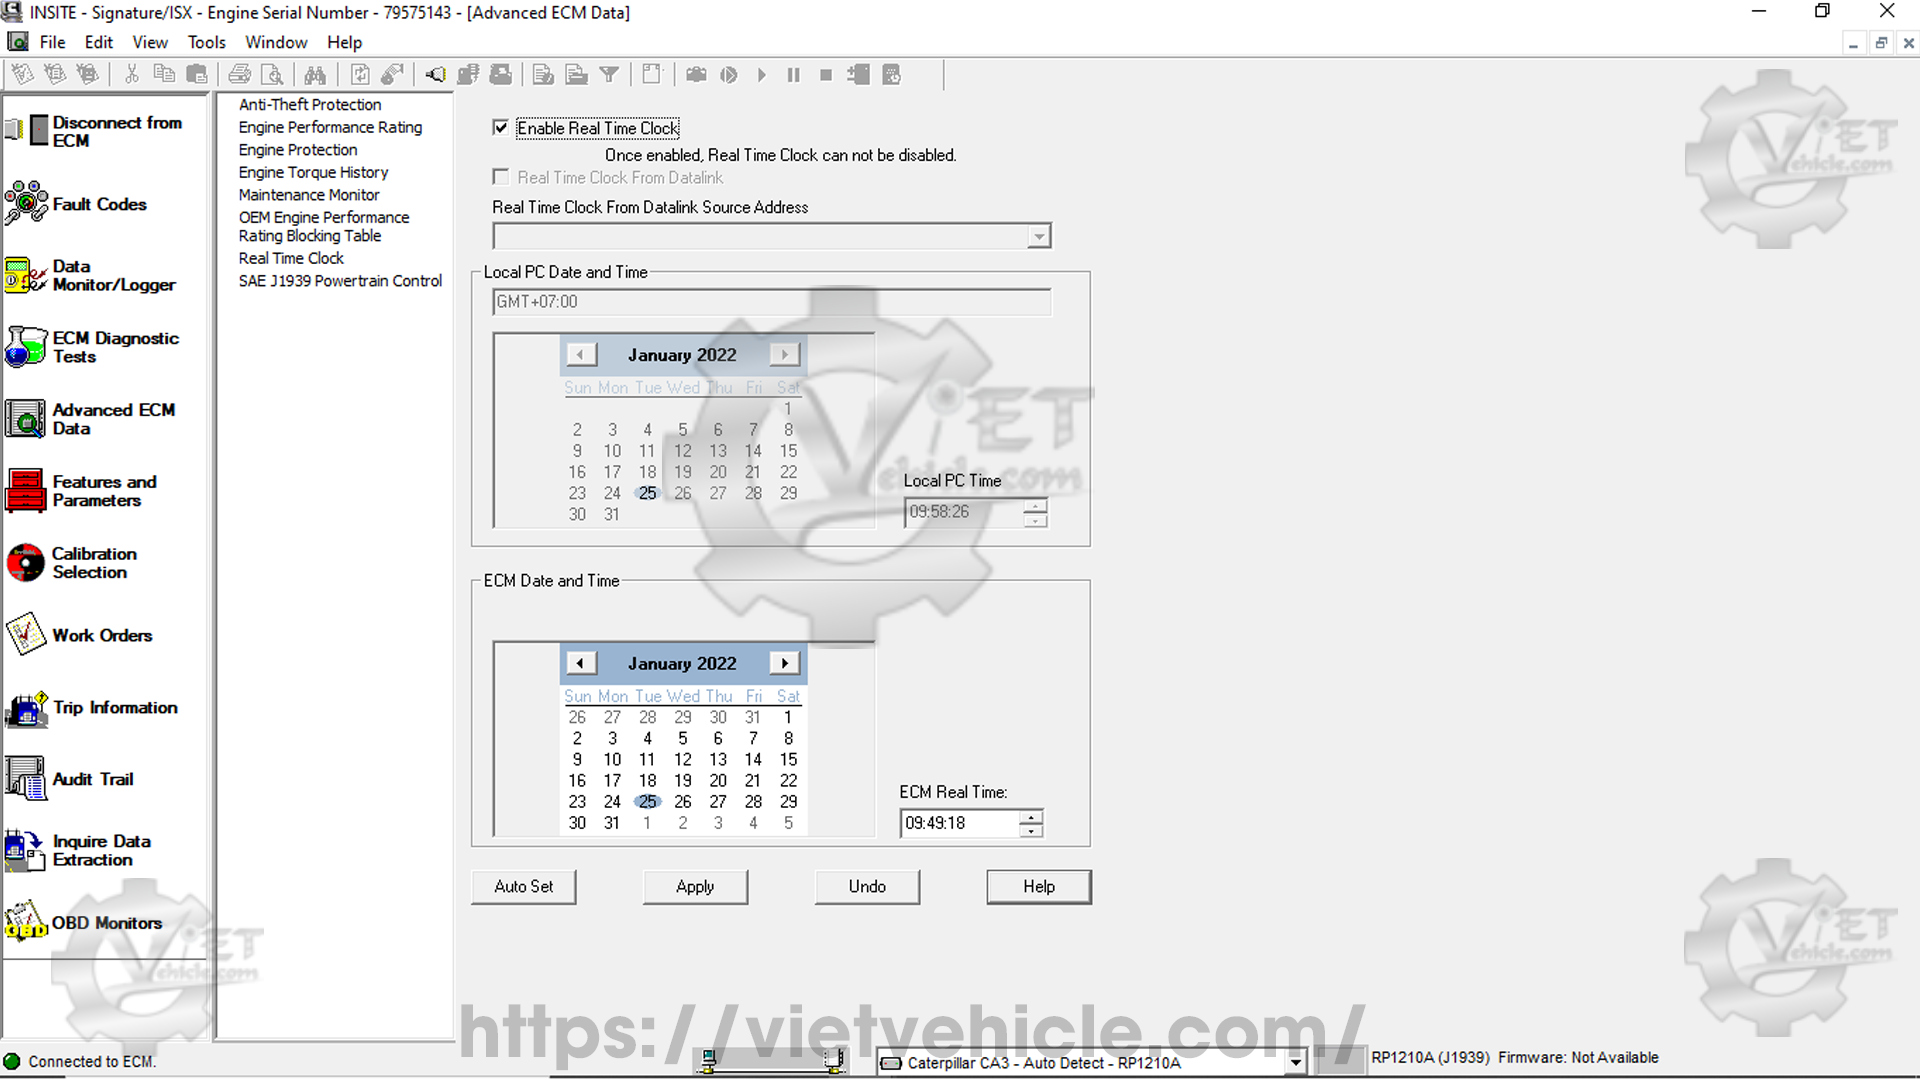
Figure 1.4 – Enable Real Time Clock
c) Setting the Real Time Clock
The Real Time Clock can be set either automatically or manually:
Automatically Setting the Real Time Clock
- Verify that the Local PC Date and Time are displayed correctly. If incorrect, make adjustments within Windows.
- Select Undo and close INSITE™.
- Adjust the PC Date and Time as needed.
- If the Local PC Time and Date are correct, select the Auto Set button.
Manually Setting the Real Time Clock
- Verify that the Local Time Zone is correct.
- Set the correct ECM Date and Time.
- Select Apply to save these settings to the ECM.
d) Saving Changes
- Follow the prompts to save changes to the ECM.
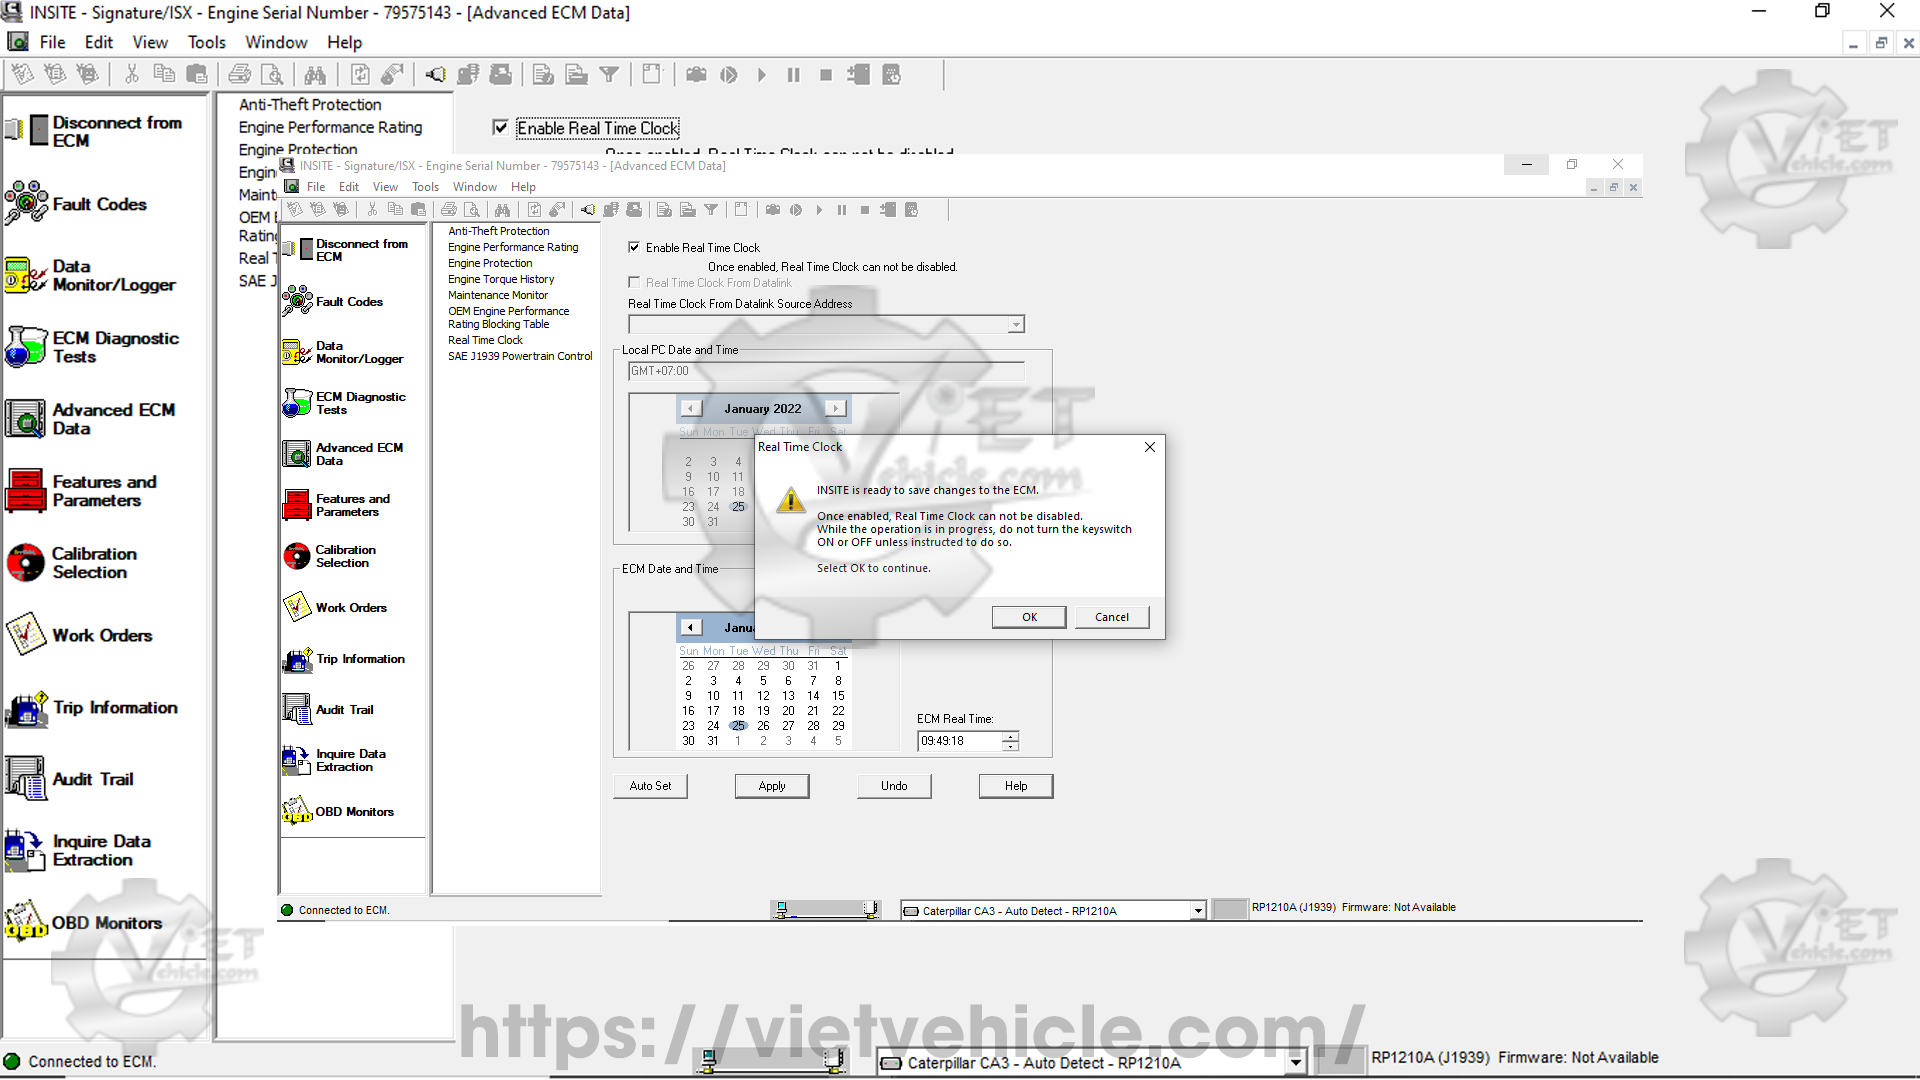
Figure 1.5 – Select OK to Continue
Note: Once enabled, the Real Time Clock cannot be disabled, and ECM cumulative hours will no longer be available.
e) Undoing Changes
- Select Undo to exit the Real Time Clock window without applying changes to the ECM.
ECM Replacement Considerations
If the ECM is replaced, total Trip Information is lost. The following offsets must be entered:
- Engine Time Offset
- Engine Distance Offset
- ECM Time Offset
- ECM Distance Offset
Entering these values ensures accurate tracking of total trip information for the engine’s lifespan with the new Electronic Control Module (ECM).
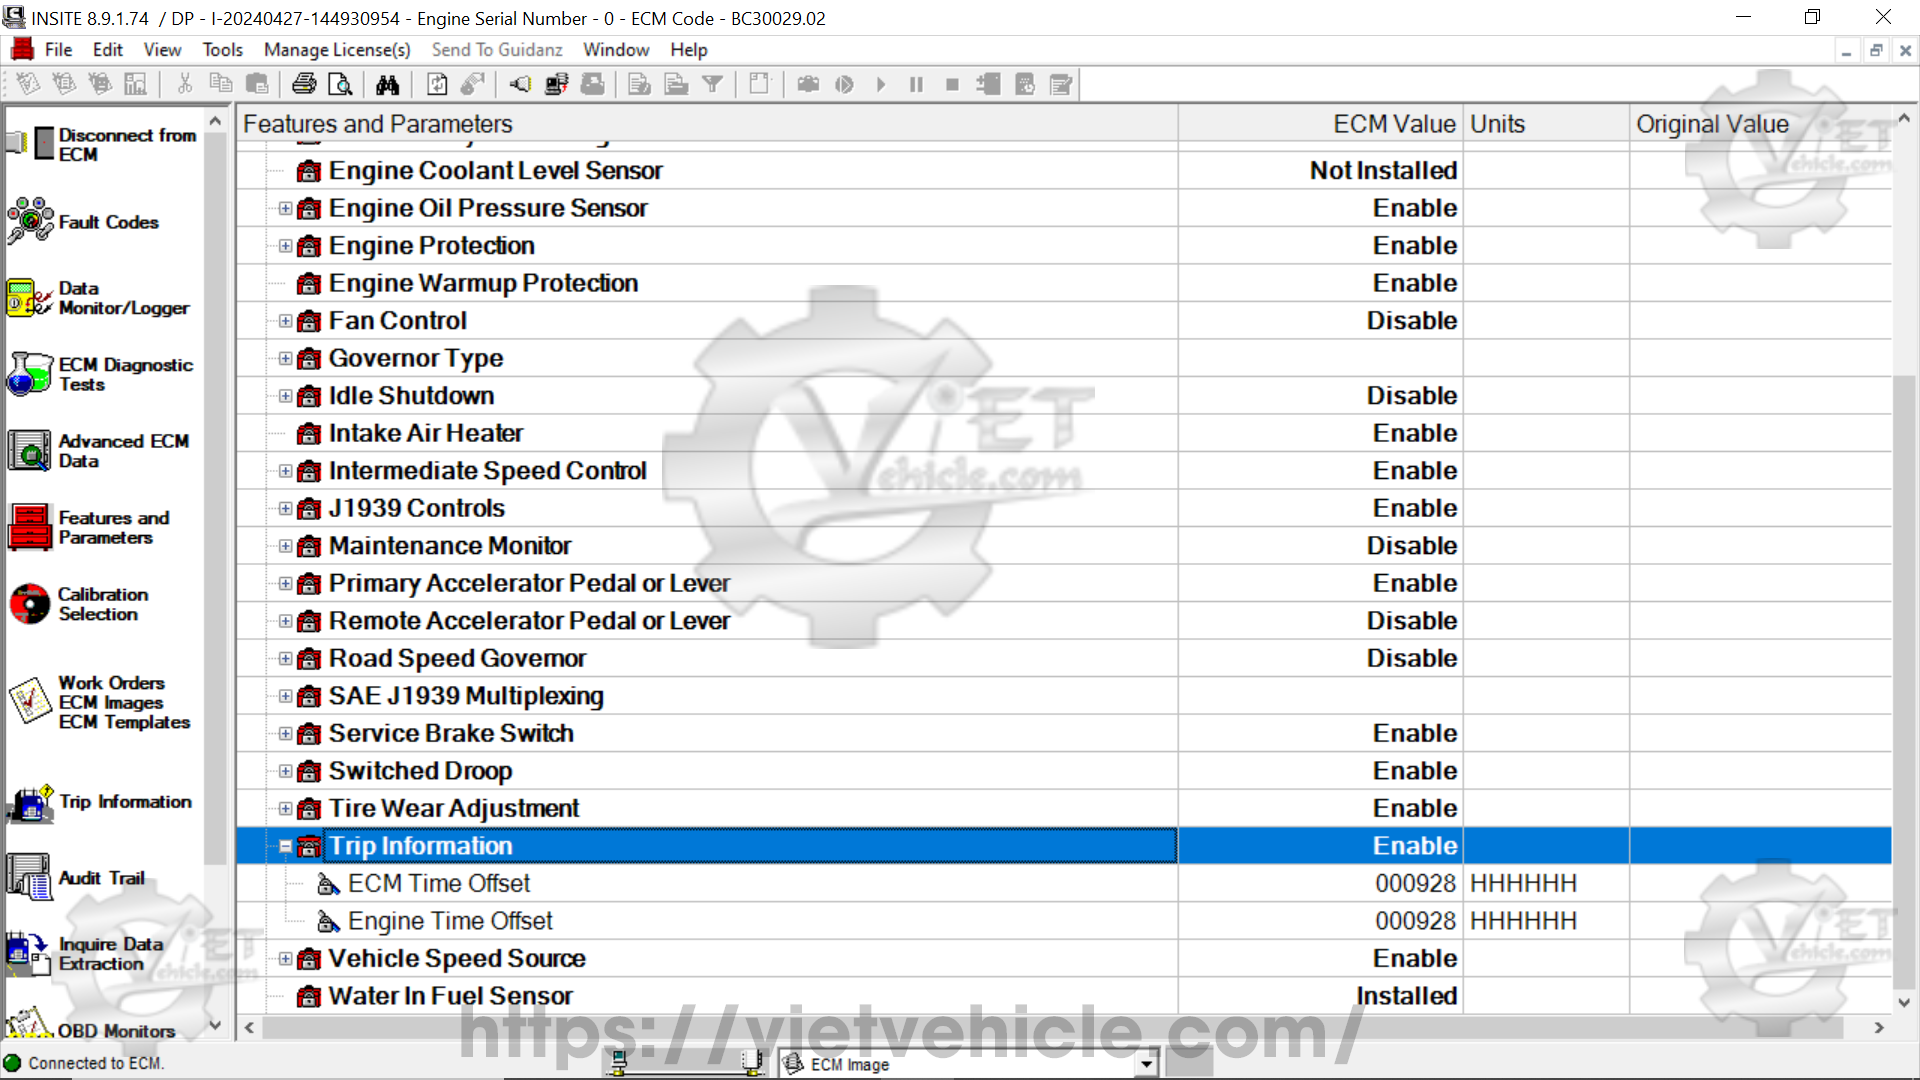
Figure 1.6 – Trip Information
Contact Us
Whatsapp: +84.858.966.333
Facebook: VIETVehicle Remote Delete Service
YouTube: VIETVehicle – ECM Delete Tuning
Tiktok: VIETVehicle.com
Website: VIETVehicle.com

