To Connect to an ECM
1). Open Cummins INSITE through the shortcut on the desktop, using the Status bar to select connection options.
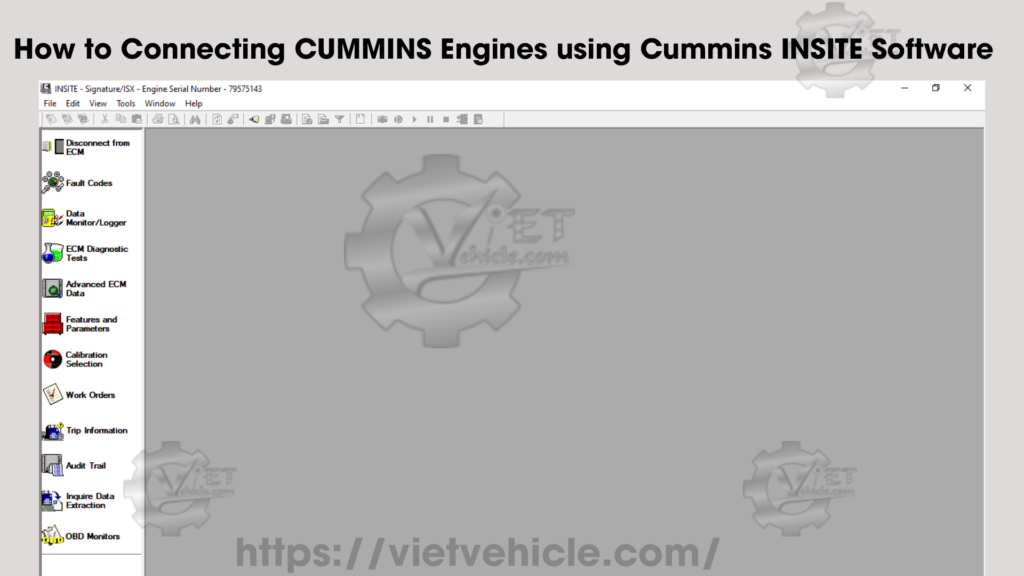
Cummins INSITE Software
This figure shows the main interface of the Cummins INSITE software.
- Details:
- The interface includes a top menu bar with options such as File, View, Tools, etc.
- The Status bar is visible at the bottom, showing the current connection status and available options.
- A navigation panel on the left provides quick access to various functions like Diagnostics, Work Orders, Reports, and Settings.
2). Click the dropdown box on the Status bar to view a list of all currently available connection options, or click Add New to create one, then click Next.

Status Bar (Connection Options)
This figure shows the Status bar with the Connection Options dropdown.
- Details:
- The Status bar is at the bottom of the screen, showing the connection status, such as Not Connected or Connected to ECM.
- The dropdown box contains a list of available connection methods (e.g., Datalink Adapter, USB, Ethernet).
- The Add New option allows you to add a new connection configuration for future use.
3). Use the ECM Connection Type page, and choose Datalink Adapter (Connect using a Datalink Adapter), then click Next.

ECM Connection Wizard
This figure shows the ECM Connection Wizard with the Datalink Adapter selected.
- Details:
- The wizard guides you through the connection setup process.
- The Datalink Adapter option is selected in the wizard, indicating the type of adapter to use for the ECM connection.
- There are Next and Cancel buttons for proceeding or aborting the setup.
4). Select Connection Settings, Datalink Adapter Vendor, Datalink Adapter, and Datalink Protocol, then click Next.

ECM Connection Type
This figure shows the ECM Connection Type page in the connection wizard.
- Details:
- Displays options for choosing the Datalink Adapter and Connection Settings (e.g., Vendor, Adapter type).
- You can select the Datalink Protocol in this section as well.
- Once the settings are correct, you can click Next to continue.

Datalink Adapter Vendor
This figure shows the selection of the Datalink Adapter Vendor in the connection wizard.
- Details:
- A dropdown list to choose the manufacturer of your Datalink Adapter (e.g., Cummins, Detroit Diesel).
- Ensures compatibility between the software and adapter for communication with the ECM.

Datalink Adapter
This figure shows the selection of the Datalink Adapter type.
- Details:
- The screen shows a list of available adapters, such as Cummins Inline 5, Inline 6, etc.
- These options vary depending on the type of Datalink Adapter you are using.

Datalink Protocol
This figure shows the Datalink Protocol selection in the wizard.
- Details:
- Choose the appropriate communication protocol for the ECM connection (e.g., J1939, J1708).
- Selecting the correct protocol is important for ensuring the correct data transfer between the ECM and INSITE software.
6). Click Connect to ECM.
→ If you are connecting to a new ECM or an ECM without existing ECM passwords, select “None” in the Security Type dropdown list.
→ If you then want to define ECM security type passwords, select ECM Passwords on the Tools menu once connected to the ECM.

New Work Order
This figure shows the New Work Order screen after successful connection to the ECM.
- Details:
- The Work Order Wizard appears, allowing you to create a new work order for the selected ECM connection.
- Information such as ECM Model, VIN, and Work Order Number can be filled out in this screen.
- The OK button finalizes the process, and the work order will be saved.
7). The Work Order Wizard is automatically displayed for you to create a work order for the selected connection, then click OK.
→ You can disable the Wizard from starting automatically by unchecking the Enable Work Order Mode checkbox in the Work Orders page of the Options window.

Work Order/Image Creation
This figure shows the Work Order/Image Creation progress bar.
- Details:
- The progress bar indicates the completion status of the image creation process after connecting to the ECM.
- This process may take some time, depending on the ECM and the amount of data to be retrieved.
- The percentage (0% to 100%) shows how much of the work order/image has been created.

Connected to ECM
This figure shows the Connected to ECM screen.
- Details:
- The software interface indicates a successful connection to the ECM.
- The Status bar at the bottom of the screen now shows Connected to ECM, and the user can begin working with the connected ECM.
- Other tools and options are now available for diagnostics, maintenance, and programming.

This detailed breakdown preserves the original text while explaining each figure. Let me know if you need further changes!
Contact Us
- Whatsapp: +84.858.966.333
- Facebook: VIETVehicle Remote Delete Service
- YouTube: VIETVehicle – ECM Delete Tuning
- Tiktok: VIETVehicle.com
- Website: VIETVehicle.com


